
Installation Instructions
Make sure no plumbing or electrical lines are beneath the work area.
Tools needed:
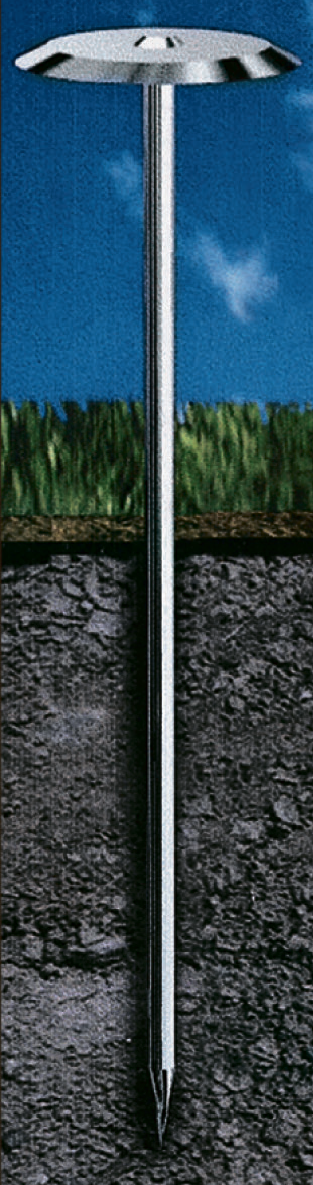
The PCO Poly Spike has many uses in the business, home, construction, nurseries and outdoor recreation areas. This tough long lasting 5 inch steel spike with a 1 inch diameter head is ideal for securing moisture barrier and other ground cover products such as polyethylene, burlap and similar materials. The PCO Poly Spike is less likely to bend than traditional nails or staples of the same length.
The PCO Poly Spike is designed with a sharp point, which easily deflects any small stones and similar items. We suggest you use at least 8 or 10 mil polyethylene.
YOUR CUSTOMER WILL APPRECIATE THE VERY PROFESSIONAL JOB YOU DO WITH THE PCO POLY SPIKE
Instructions:
1. Depending on the hardness of the soil, the PCO Poly Spike may be inserted by hand. We recommend using gloves when inserting by hand as some spikes may have burrs. In hard ground we suggest a lightweight hammer.
2. For polyethylene and other similar covers, insert a PCO Poly Spike every 8 to 12 inches. At seams, bend 2 inches of the plastic edge under itself making a fold to provide a strong connecting edge. Insert the spike through he fold and lightly push or tap the spikes head until it touches the surface of the plastic. This makes a secure fit between the plastic and ground. (Note: Do not bind the plastic. Binding can possibly rip the polyethylene when moving around under the house.)
3. For rough or varying soil surface heights, adjust the number of spikes and their distances accordingly.
4. It is recommended that you leave approximately 10% of the ground surface uncovered to provide natural moisture needed.
Tools needed:
- Tape Measure
- Hammer
- Safety Glasses
- Work Gloves
The PCO Poly Spike has many uses in the business, home, construction, nurseries and outdoor recreation areas. This tough long lasting 5 inch steel spike with a 1 inch diameter head is ideal for securing moisture barrier and other ground cover products such as polyethylene, burlap and similar materials. The PCO Poly Spike is less likely to bend than traditional nails or staples of the same length.
The PCO Poly Spike is designed with a sharp point, which easily deflects any small stones and similar items. We suggest you use at least 8 or 10 mil polyethylene.
YOUR CUSTOMER WILL APPRECIATE THE VERY PROFESSIONAL JOB YOU DO WITH THE PCO POLY SPIKE
Instructions:
1. Depending on the hardness of the soil, the PCO Poly Spike may be inserted by hand. We recommend using gloves when inserting by hand as some spikes may have burrs. In hard ground we suggest a lightweight hammer.
2. For polyethylene and other similar covers, insert a PCO Poly Spike every 8 to 12 inches. At seams, bend 2 inches of the plastic edge under itself making a fold to provide a strong connecting edge. Insert the spike through he fold and lightly push or tap the spikes head until it touches the surface of the plastic. This makes a secure fit between the plastic and ground. (Note: Do not bind the plastic. Binding can possibly rip the polyethylene when moving around under the house.)
3. For rough or varying soil surface heights, adjust the number of spikes and their distances accordingly.
4. It is recommended that you leave approximately 10% of the ground surface uncovered to provide natural moisture needed.